Skip to content
 Overview
When you’re crafting a Custom travel backpack, these ten stitching methods cover everything—basic seams, edge finishes, and top‑tier reinforcement. Each section lists Purpose, Tools & Settings, Key Points, and Steps.
- Basting – Hold layers in place for fitting.
- Lockstitch – Join panels for your bag’s main seams.
- Overlock (Serger) – Trim edges and lock them in one go.
- Topstitch – Flat seams that double as decoration.
- Bar‑tack – Tiny, dense stitches where stress peaks.
- Box‑X Stitch – A square plus “X” for handle strength.
- Coverstitch – Stretch‑friendly hems with a clean finish.
- Boxed Bottom Corners – Give your bag a flat, stand‑up base.
- Interfacing – Fuse or sew in lining to add shape.
- Buttonhole Stitch – Reinforced eyelets—no hardware needed.
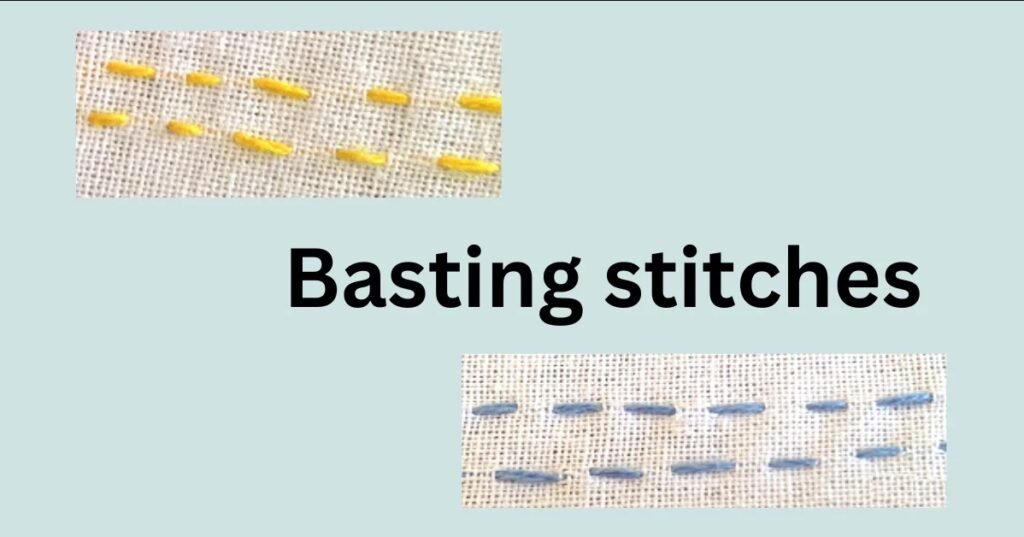
1.Temporary fixing seam (Basting)
- Purpose: Temporarily fix the layers of the backpack (fabric, lining, zipper) to facilitate alignment and adjustment.
- Tools and settings: 80/12 ordinary machine needle, adjust the seam length to 4–5mm.
- Key points: The fixing seams on the backpack are loose, easy to remove, and do not bear weight.
- Steps:
- Align the layers of the backpack and sew a straight line with a large seam length.
- After confirming the position is correct, remove the fixing seams.
2.Chain stitch (Lockstitch)
- Purpose: Sew the main seam of the backpack, such as the connection between the side panel and the bottom panel.
- Tools and settings: Home sewing machine, 2.5mm straight stitch, needle size is selected according to the weight of the backpack fabric.
- Key points: The upper and lower threads are interlocked, the backpack is firmly sewn and not easy to unravel.
- Steps:
- Adjust the tension to make the backpack stitch smooth.
- Feed the cloth steadily and complete the chain stitch along the seam edge.

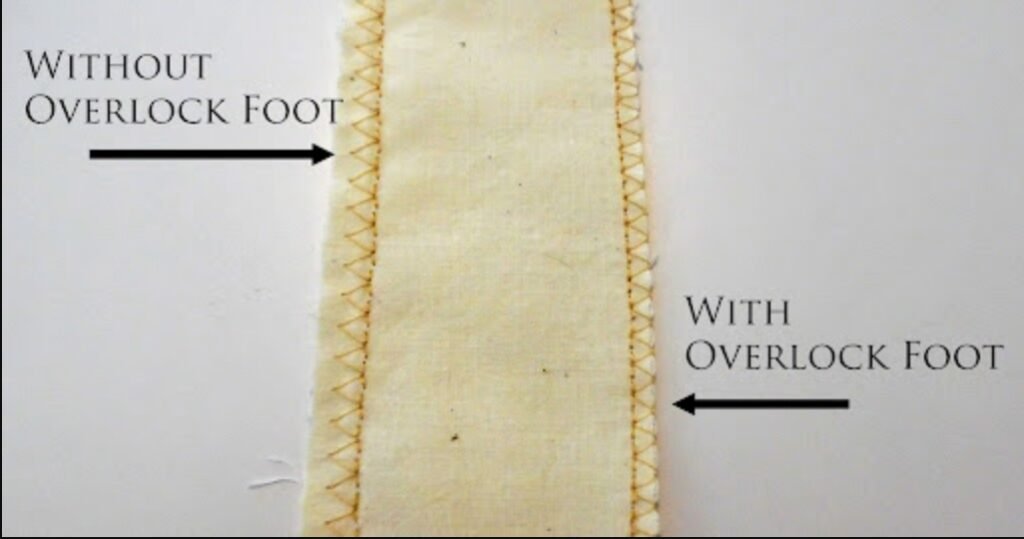
3.Overlock/Serger
- Purpose: Trim and overlock the backpack fabric at one time to prevent unraveling.
- Tools and settings: 3-5 thread overlock machine, equipped with sharp edge knife, needle size is determined by the backpack fabric.
- Key points: High-speed overlocking, the edge of the backpack is beautiful and wear-resistant.
- Steps:
- Leave enough seam allowance for the backpack (about 3-5mm) and feed it into the overlock machine.
- Adjust the height of the knife to ensure that the cut and the stitch are synchronized.
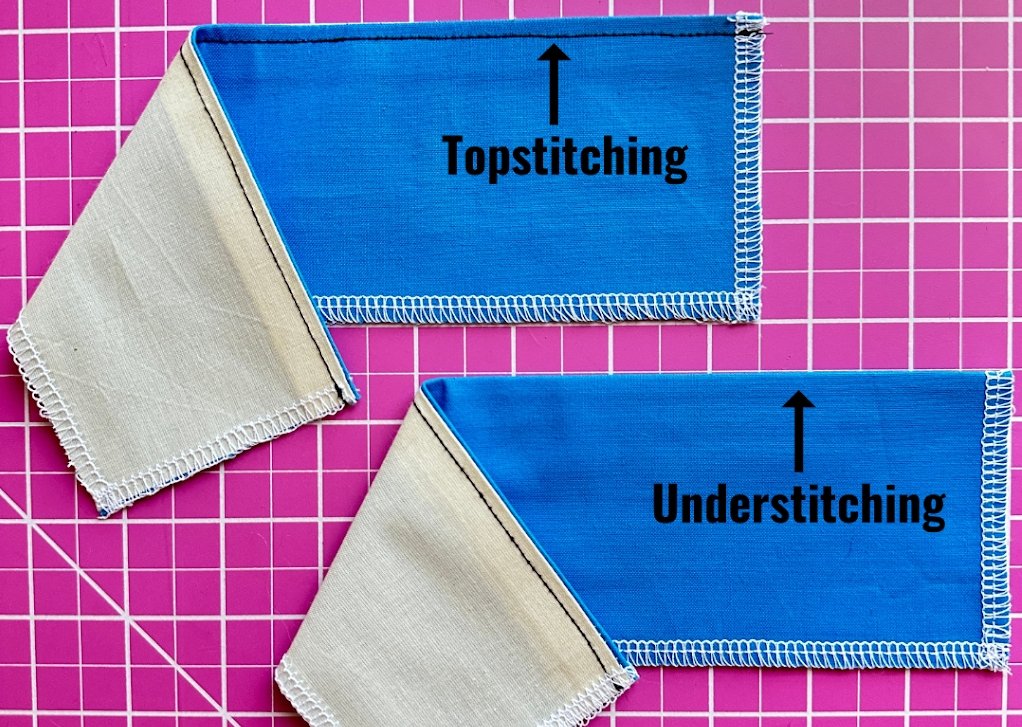
4.Topstitch
- Purpose: Make parallel decorative seams on the surface of the backpack to flatten the seam edges and add beauty.
- Tools and settings: Topstitch foot, 3mm stitches, can use contrasting color thread to highlight the details of the backpack.
- Key points: The stitches are clear and flat, highlighting the edge contour of the backpack.
- Steps:
- Align the edge of the presser foot with the seam edge of the backpack.
- Keep the fabric flat and sew at a steady speed.
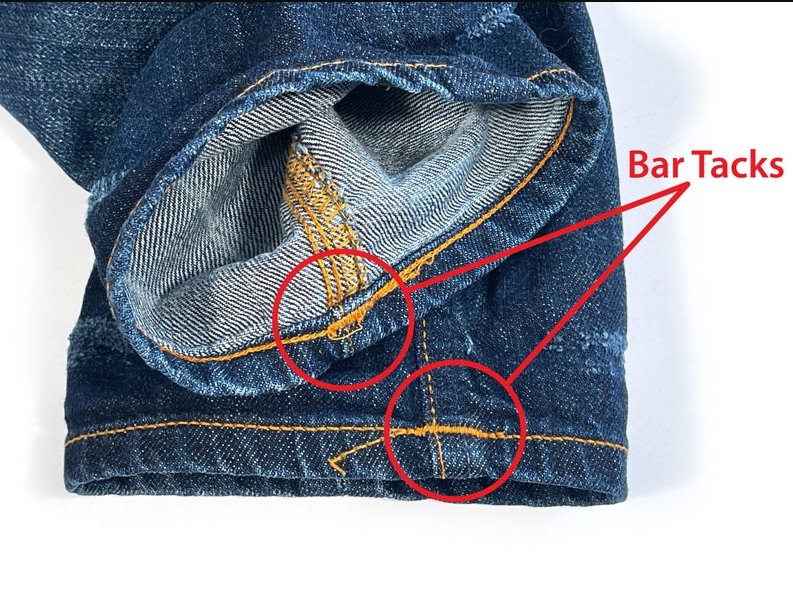
5.Bar‑tack
- Purpose: Reinforce high-stress locations on the backpack, such as shoulder strap connection points and zipper heads and tails.
- Tools and settings: Bar‑tack mode on industrial reinforcement sewing machines, or wide zigzag stitches on home machines, with a seam distance of 1–2mm.
- Key points: Short-distance back-and-forth intensive stitching, high strength at key points of the backpack.
- Steps:
- Align the stress point of the backpack with the center of the machine head.
- Sew back and forth several times and then lock the seam.
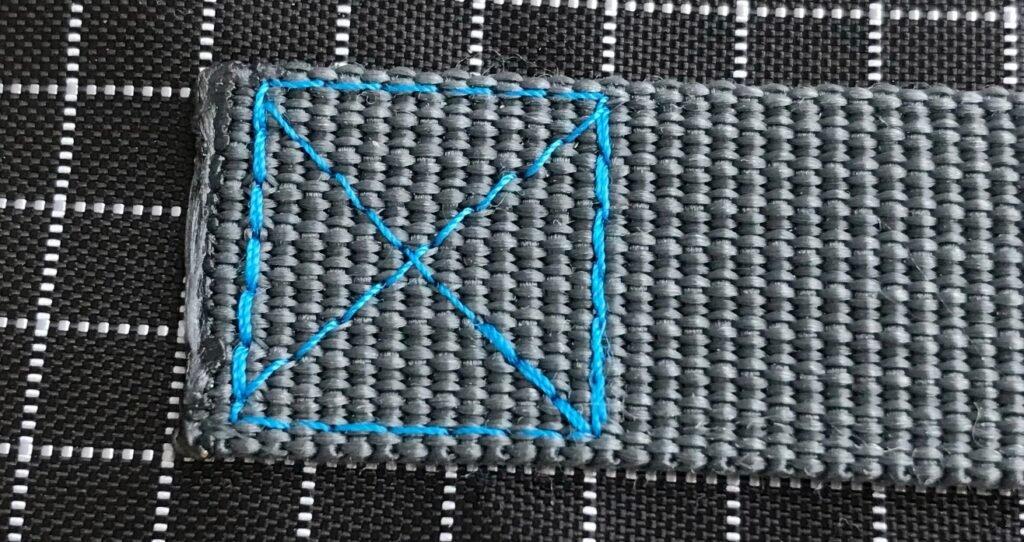
6.Box-X Stitch
- Purpose: Make a box and “X” stitch on the backpack handles and shoulder straps to disperse the tension.
- Tools and settings: ordinary flat sewing machine, strong sewing thread, medium-coarse needle size suitable for backpack webbing.
- Key points: The box + diagonal line makes the backpack handle more resistant to pulling.
- Steps:
- Mark the four corners of the box at the base of the backpack handle.
- Sew the four sides, then rotate and sew the two diagonal lines.
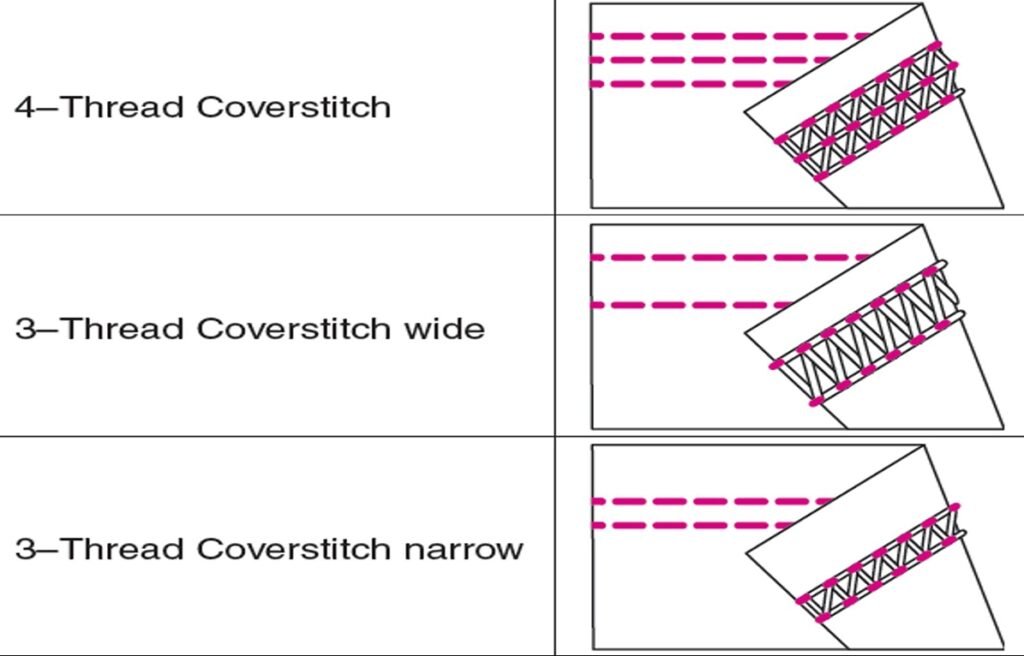
7.Coverstitch
- Purpose: Organize the elastic pockets or hems of the backpack, and cover the bottom edge of the fabric.
- Tools and settings: Double-needle coverstitch machine or household double needle, stitch length 2.5–5mm, with Looper thread.
- Key points: Parallel double lines on the top, cross-hemming on the bottom, good elasticity of the backpack mouth.
- Steps:
- Feed the edge of the backpack into the machine mouth.
- Monitor the alignment of the double lines and feed the cloth evenly.
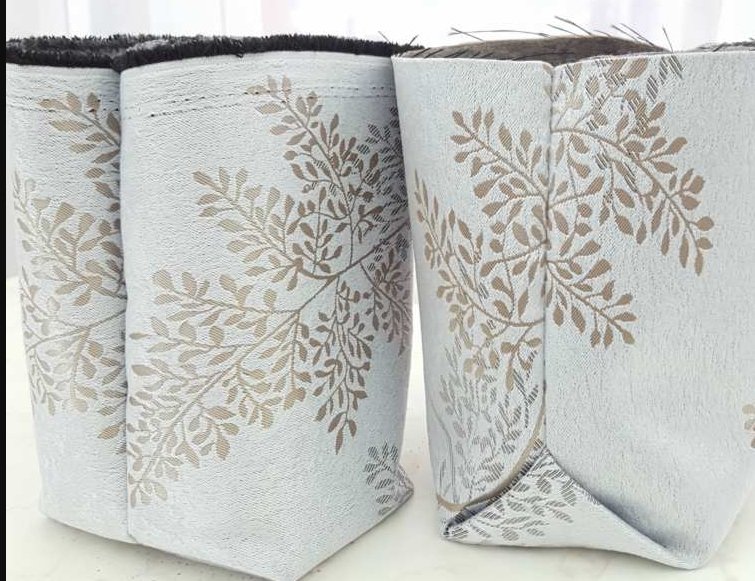
8.Boxed Bottom Corners
- Purpose: Make a flat support for the bottom of the backpack so that the backpack can stand on its own.
- Tools and settings: Home sewing machine, 2.5mm stitch.
- Key points: Cut corners and sew flat, the bottom of the backpack is three-dimensional and stable.
- Steps:
- Cut out equilateral triangles at the bottom corners of the backpack.
- Fold the triangle in half, sew the bottom edge and cut off the excess cloth corners.
9.Interfacing
- Purpose: Add lining to the custom travel backpack pockets, flaps, and main body to improve stiffness and durability.
- Tools and settings: hot-melt lining is bonded with iron, and sewing lining is done with straight stitches.
- Key points: different weights can be selected, and the backpack parts are more stable and not easy to deform.
- Steps:
- Cut the lining to the same size as the backpack fabric.
- Iron and bond or sew into the backpack structure.
10.Buttonhole Stitch
- Purpose: Make drawstring holes or drainage holes on the backpack to enhance the wear resistance of the hole edges.
- Tools and settings: Home machine buttonhole function or narrow zigzag stitch, with extremely short seam distance.
- Key points: Tight ring stitching, the travel backpack hole edge is not easy to fall off.
- Steps:
- Mark the hole center and length on the backpack fabric.
- Machine needle reciprocating or buttonhole mode lock stitch, back stitch lock thread.

With these tweaks, your Custom travel backpack will look handcrafted, feel robust, and carry your adventures in style.